Red light by @erwanhesry on Unsplash
In one of my previous guides, I wrote about toggling your Philips Hue Depending on Your PC State. This guide inspired me to do more with the Philips Hue API v2. I’m a programmer in my normal day job and after writing software, my code gets deployed with a CI/CD pipeline. I wanted to see if I could change the color of my light when the build succeeded or failed. This guide will go into depth about how to color your Philips Hue light dependent on your build result.
Prepare your pipeline
Before we choose any sort of pipeline, we will need to make sure we have a couple of variables before we can start with the development. In this guide, we will do things a little differently as we won’t use a CA certificate like in the toggle on your PC state guide. As the pipeline needs to run on a local machine (for now, a new guide will come with remote access!) it’s less important, and using the CA certificate would make your pipeline less readable. If you do want to use the certificate I would like to refer you to my other guide and include that in your pipeline.
Here is a list of what we need:
- Find your bridged IP address
- Get an authenticated username
- Find the lights to automate
1. Find your bridged IP address
Fortunately, the Hue system comes with an API that can be controlled easily through web requests. But before we can try anything with our Philips Hue lights we first need to find the IP address of our bridge. The bridge will be the receiver of all our web requests. A very nice tutorial can be found here. But as we only need the IP of our bridge for now we can also go to this link: https://discovery.meethue.com/.
The link will show you a small JSON response with the internal IP address of your bridge. The response will look somewhat like this:
[
  {
    "id": "ecbdsa5afffe1303cf",
    "internalipaddress": "192.168.1.41"
  }
]
Write this IP address down as we need it in the other steps.
2. Get an authenticated username
As with any other protected system nowadays, the Hue system requires a user to authenticate him or herself. To get this we need to do a couple of calls. The easiest way to do this is with Postman.
Now we need to send an authentication request to authenticate ourselves. Send a post request to the URL https://<bridge_ip_address>/api with the following message body { "devicetype" : "My_amazing_computer" } . You’ll then see the following message:
[
 {
  "error": {
   "type": 101,
   "address": "",
   "description": "link button not pressed"
  }
 }
]
Now go and press the link button on your bridge and then press the POST button again. You should now get a successful response like below:
[
 {
  "success": {
   "username": "j5hvYCkJPN8a87daQ6a0mmxBcG6ozeLp3zXU5lgc",
   "clientkey": "ZV17AVUNUB95G2UXW64TEXDZD"
  }
 }
]
There you go! You now have your authenticated username. Write this one down as well, we will use it in the next stage.
3. Find the lights to automate
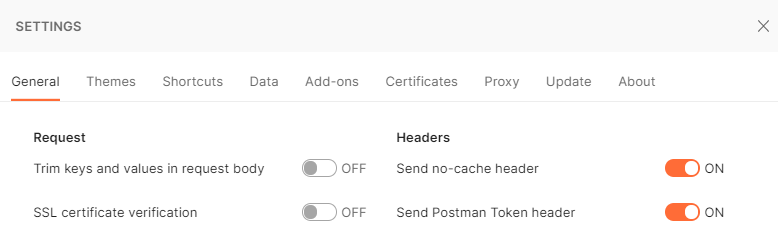
As stated in the introduction, Signify upgraded its security quite a bit. One part is that v2 of the API only allows calls over HTTPS. In this guide, we will be using the insecure flag within our curl request but feel free to use a CA certificate as explained in my other guide. During the testing phase with Postman, you will need to make you disable ‘SSL certificate verification’ in File – Settings menu.
Now, all we need to do is create a request to fetch all the lights with our username as a header and find the lights we want to use. Call the following URL in postman and add this header: “hue-application-key: j5hvYCkJPN8a87daQ6a0mmxBcG6ozeLp3zXU5lgc” (but replace it with your authenticated username)
https://<bridge_ip_address>/clip/v2/resource/light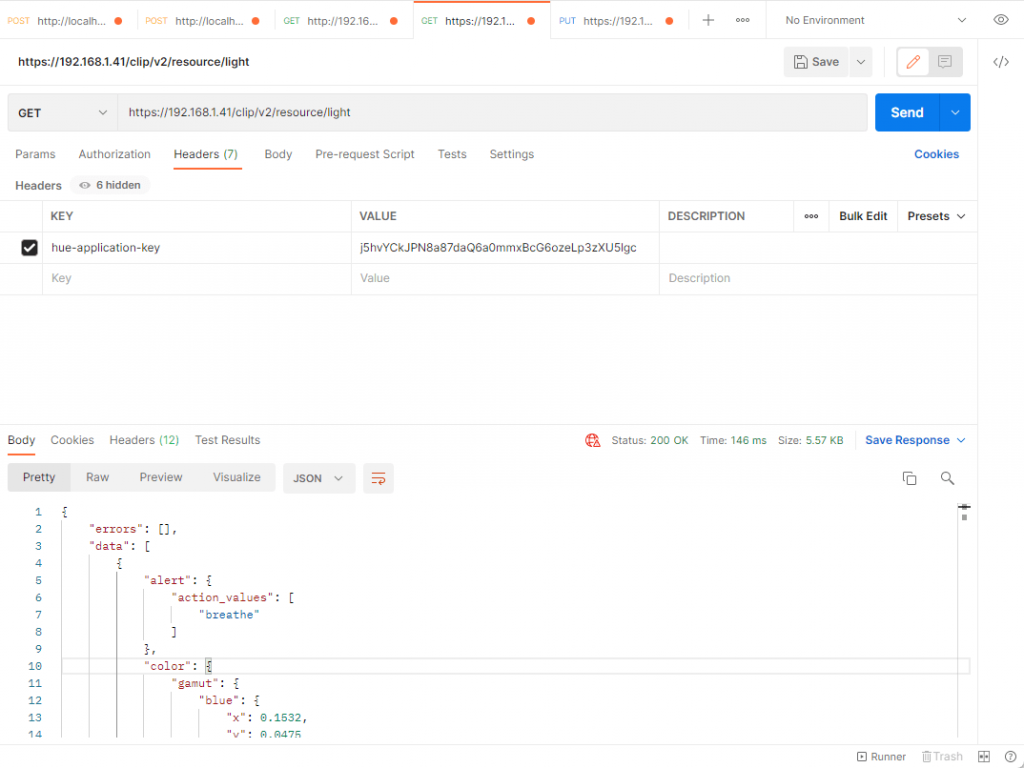
This will give you a JSON response with all the lights in your system. All these lights will have the same name corresponding to them as you will see in the Hue app. For my example, I will use lights the two Hue light bars with the following ids (‘18233658-5cdb-42d1-9b08-588210dsadsaj2’ and ‘18233658-dajji-dsadi-9b08-dsajdsaiuidsa’).
Create the cURL script
Now that we have our bridge IP, authenticated username, and lights to automate we can begin with some real programming! In this part, we are going to write a cURL script. The script will change the light color depending on the arguments or variables. The code to achieve this is written in bash as bash is included on most build servers. To develop it locally, if you don’t already have it, the easiest way to get bash is by installing GIT. Git will automatically install Git Bash for you. Now create a color_hue.sh file with the following content:
# Hue Bridge IP
BRIDGEIP="192.168.1.41"

# Application Key
USERNAME="j5hvYCkJPN8a87daQ6a0mmxBcG6ozeLp3zXU5lgc"

# Your light ID
LIGHTIDS="bb779834-ad35-46dc-8a83-3907ffce8310"

# Command to toggle the light
if [ "$1" == "Succeeded" ]; then
  REQUEST='{"color": {"xy": {"x": 0.5,"y": 1}}}'
elif [ "$1" == "Canceled" ]; then
  REQUEST='{"dimming": {"brightness": 50.0},"color": {"xy": {"x": 0.3,"y": 0.3}}}'
elif [ "$1" == "Failed" ]; then
  REQUEST='{"color": {"xy": {"x": 1,"y": 0.5}}}'
fi

curl --insecure -H "hue-application-key: $USERNAME" -X PUT "https://$BRIDGEIP/clip/v2/resource/light/$LIGHTID" -H 'Content-Type: application/json' --data-raw "$REQUEST"
First of all, you will need to replace the following variables with your own values: BRIDGEIP, USERNAME, and LIGHTID. After setting the initial values, the script will define your request depending on the status of your build. This is of course dependent on the build pipeline of choice. In the example above I choose to use the first argument given “$1” but this will need to be replaced by the variable of your pipeline. Now let’s try out or script by running the following command within Git Bash in your folder: “bash color_hue.sh Succeeded“
Setup your Pipeline
Creating a pipeline to run the bash script we have just created is different depending on where your run your pipeline. In this chapter, we will learn how to set it up correctly with Azure DevOps and with Github. But stay tuned for more pipelines and a guide to using hosted pipelines with remote access.
Philips Hue with Azure DevOps
As discussed earlier this blog covers the topic of coloring your Hue lights from a local build machine. The process to do this is easier than you might think. We are going to add one task to your build pipeline that always runs no matter the status of the pipeline. This task will be placed as your last task of the build pipeline. Within this task, the current pipeline status is extracted and used to color the light accordingly. The task is shown below:
- script: |
    # Hue Bridge IP
    BRIDGEIP="192.168.1.41"

    # Application Key
    KEY="j5hvYCkJPN8a87daQ6a0mmxBcG6ozeLp3zXU5lgc"

    # The light ID
    LIGHTID='bb779834-ad35-46dc-8a83-3907ffce8310'

    if [ "$AGENT_JOBSTATUS" == "Succeeded" ]; then
      REQUEST='{"color": {"xy": {"x": 0.5,"y": 1}}}'
    elif [ "$AGENT_JOBSTATUS" == "Canceled" ]; then
      REQUEST='{"dimming": {"brightness": 50.0},"color": {"xy": {"x": 0.3,"y": 0.3}}}'
    elif [ "$AGENT_JOBSTATUS" == "Failed" ]; then
      REQUEST='{"color": {"xy": {"x": 1,"y": 0.5}}}'
    fi

    curl --insecure -H "hue-application-key: $KEY" -X PUT "https://$BRIDGEIP/clip/v2/resource/light/$LIGHTID" -H 'Content-Type: application/json' --data-raw "$REQUEST"
  displayName: 'Color Philips Hue light'
  condition: always()
That’s it! We placed our newly created bash script as Azure Pipeline script. Now try out the different statuses, let your build fail or cancel it and see what happens.
Philips Hue with GitHub
For GitHub pipelines, it’s also required to use a local build machine, so make sure the variable “runs-on:” is set up correctly. Now we are going to add one task to your build pipeline that always runs no matter the status of the pipeline. This task will be placed as your last task of the build pipeline. Within this task, the current pipeline status is extracted and used to color the light accordingly. The script looks a little different from the one from Azure DevOps as we need to fetch the current status in a different way. The task is shown below:
    steps:
    - name: Color Philips Hue light
      if: always()
      run: |
        # Hue Bridge IP
        BRIDGEIP="192.168.1.41"

        # Application Key
        KEY="j5hvYCkJPN8a87daQ6a0mmxBcG6ozeLp3zXU5lgc"

        # The light ID
        LIGHTID='bb779834-ad35-46dc-8a83-3907ffce8310'

        if [ "${{ job.status }}" == "success" ]; then
          REQUEST='{"color": {"xy": {"x": 0.5,"y": 1}}}'
        elif [ "${{ job.status }}" == "cancelled" ]; then
          REQUEST='{"dimming": {"brightness": 50.0},"color": {"xy": {"x": 0.3,"y": 0.3}}}'
        elif [ "${{ job.status }}" == "failure" ]; then
          REQUEST='{"color": {"xy": {"x": 1,"y": 0.5}}}'
        fi

        curl --insecure -H "hue-application-key: $KEY" -X PUT "https://$BRIDGEIP/clip/v2/resource/light/$LIGHTID" -H 'Content-Type: application/json' --data-raw "$REQUEST"
That’s it! We placed our newly created bash script as GitHub Pipeline script. Now try out the different statuses, let your build fail or cancel it and see what happens.
Change Philips Hue Light Color After Build Fails
Software developers want to know if their build failed. One way would be by playing an alarm if this happened but a much cooler and subtle way is by coloring your Hue lights. This blog guides you in that process. It shows the script that we need to create and how to run it in Azure DevOps and GitHub pipelines. But this is not all, become part of the community to learn how to do it with a hosted pipeline and remote access or use different pipelines.
I hope you learned something today, happy coding 😊